background

Sunday, October 2, 2011

Fridge O'Lantern

I got the idea for this magnetic Jack O'Lantern online and thought it would be a fun, easy project to kick off the month of October. Plus, we hardly have any Halloween decorations, so I thought this would help make up for the lack of spirit. Brynn and I headed out to JoAnn Fabrics for some supplies. I downloaded a pumpkin template from the internet and increased the size to fit on one sheet of computer paper, then cut it out. I then traced this template onto a piece of orange construction paper and added a bit of green for the stem.
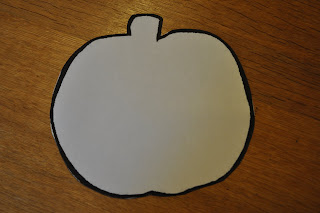
After doing that, I began to peel the plastic coating off of the self-adhesive magnetic sheet - what a bear. I must have gotten the wrong type of magnetic sheeting. It was nearly impossible to get the darn stuff off. I bought two sheets, but will be taking the other one back for sure. Brynn's old toddler group used to make magnets all the time, so there must be a product that is easier to use.
After I had removed enough of the plastic, I placed the pumpkin onto the magnetic sheet and cut around it, creating a large pumpkin magnet. I then used the scraps of magnetic sheet to put together a variety of shapes for the girls to use to create Jack O'Lantern faces. I am pleased with the way that it turned out and all of us have had fun switching up the faces throughout the day. I don't think Brynn fully understands the concept, because she prefers to use every shape each time, stating that her pumpkin has "hair, cheeks, chest and eyebrows." Nevertheless, it was a success!


Saturday, September 24, 2011

Lil' Pumpkins


Wow, fall is here already! Although, today was easily in the upper 70's; which is an uncommonly warm day for late September. This year I decided to make a set of matching pumpkin hats that the girls will be able to wear from now through Thanksgiving. I hope that I can convince Brynn to wear hers as she hunts for her own pumpkin in the patch (I'll be crossing my fingers until then). I love the way that the hats turned out.

The pattern was pretty easy to follow. The way that I got the ribbing was to use a fpdc stitch. I wanted the fit of the hats to be snug, but not to pull on the stitches. In other words, I didn't want a holey look to the hats. So, for the larger one I increased for the crown until there were 5 stitches between each fpdc and 4 between for the smaller hat. Brynn is 3.5 years old and Parker is 9 months; both hats fit great! I had never created a curly tendril prior to these hats, what a neat technique and very simple: chain 20-40, then repeat (2sc, 3sc) to the end of the chain. These are definitely great caps that work up very quickly. I think the pattern would make a cute tulip cap with brighter colors for the spring, so I may modify the stem a bit to try it later on.

Sunday, September 18, 2011

Birthday Fish Hat


I saw this hat pattern and knew that it was the perfect gift for our buddy Cole. Cole turned four this past Saturday and I finished the morning of his party. It was a fun project to do, even though I am not a fan of having to do so many finishing touches. It was a hit at the party.
Unfortunately, I didn't get any photos of the birthday boy wearing the hat - it was a bit crazy with kids during the gift time. I did, however, get Brynn wearing the hat right before heading to the party.


Tuesday, August 16, 2011

Teething Shapes


Parker recently discovered some old crocheted fish of Brynn's. She really went to town chewing on them, so I figure the texture of the yarn and stitches must feel good on her gums. With that in mind, I decided to make her some teething shapes out of cotton. I created two of each shape in different variegated yarn colors then connected them together with a single crochet stitch all around. This way the shapes stay rigid without rolling on the edges and give her some more bulk for chewing. I plan to try wetting the shapes and putting them in the freezer for an extra good chew. The other aspect that will be nice about these cotton teething shapes is that I can just throw them in the laundry with everything else, instead of having to hand clean them. Hopefully Parker will like them!

Monday, August 15, 2011

Princess B's Crown

This was a quick, morning project. Brynn has really been into dressing up as a princess lately. She has been asking for a crown, so I whipped one out. I found the "Wee Crown" pattern by Deedeen through Ravelry.
Brynn chose the hot blue for her color and was tickled with the end product. It looks a bit more like a headband than a crown, but nevertheless she loves it. I knew that the cotton I used to make the crown would stretch so I adapted the pattern a bit. The pattern, crown peaks, are in a stitch count of 11, so rather than the recommended 110 stitches in the chain row, I did 88. It's a great fit for Brynn, who is 3.5 years old.