background

Friday, February 17, 2012

A Birthday Skirt


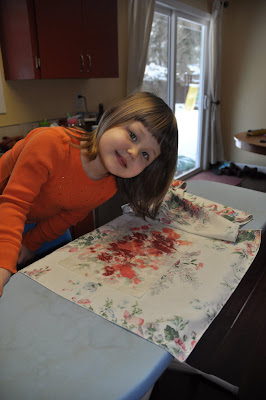
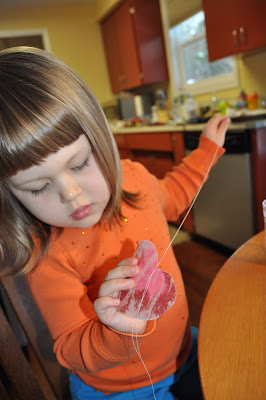
What better than a birthday occasion to craft my first skirt. Since I am still very much a novice seamstress, I used the Made tutorial for "a simple skirt." It truly was a simple pattern. I'll definitely be making more of them. I had my eye on this fabric print for the curtains in Brynn's bedroom, but I figured she'd prefer more blue in the print for those. So, when I wanted to attempt a skirt for her birthday photos, I knew this hummingbird/floral print would be just right. Brynn's favorite part of the print are the little blue birds. I love it. I had to rip out the bottom hem and do it over because my needle must have been a bit dull and caused some puckering on the first try. Overall, this little skirt is exactly what I had pictured. I think I may officially have the sewing bug in my system!


Monday, February 13, 2012

Repurposed T-shirt Skirt

I used an old HHS t-shirt to make a Valentine's Day skirt for Brynn. What a fun, quick and super easy way to craft a skirt. It also felt pretty good to be able to use supplies from home without having to put out any money. I got the idea from the blog Somewhat Simple. I'll definitely use this technique again - maybe as a way to practice my free-hand embroidery that I have yet to learn. The best part of this project was being able to use my new cutting mat. My mom is letting me borrow her rotary cutter, so I used a JoAnn's coupon to get a mat - I love it, what a genius tool. Now I just need to wait for another coupon to buy one of the clear ruler-type things (I have no idea what the technical term is) to make it even easier. So, I first cut the t-shirt to about 14 inches in length, keeping in tact the bottom hem of the shirt.

I knew that the writing would not show because of folding it over to make the waist band. The other good part about using a t-shirt is that you don't really need to finish the edges because the jersey material will not fray! So, after pinning the waist band, I sewed it and threaded the elastic through, finishing the skirt.

I then used scrap felt to cut out the letters in "love." I embroidered them onto the hemline of the skirt. This entire project only took about 45 minutes - including the time to hand sew the letters onto the skirt.


The best part is that Brynn loves it. Hopefully she'll wear it to school tomorrow for Valentine's Day! Either way it is a success!


Tuesday, January 17, 2012

Crayon Hearts


We've got some cabin fever going on here with about 7 inches of snow and more expected in the forecast. So, I looked online for a fun Valentine type craft that Brynn and I could do together while Parker napped. I found these great Crayon Hearts on Pinterest. It took longer than I anticipated to cut and attach strings to the hearts, but the overall project was completed in about 2 hours. Brynn was able to participate in most steps; I did the shape tracing and cutting, knot tying in the thread and hanging them up. Brynn loved using the scissors to cut and the needle to pierce the hearts.

The first step was to shave or sharpen crayons onto half of the amount of wax paper.
After the desired amount of crayon shavings were on the wax paper, you fold the clean half on top of the shavings and secure by folding the edges. We then placed a cloth napkin both under and on top of the wax paper prior to ironing it. The heat from the iron melts the shavings.
Once the wax cools, you then trace your shapes and cut them out. We then attached a thread to the hearts for hanging.
The picture at the top of this entry is of the original way that we hung them, but once our heat kicked on it blew the hearts and tangled them all together. So we decided to spread them out, thus looking like this:
It's not quite as I envisioned when starting out, but we made it our own with some green, pink and purple hearts. The best part is that Brynn feels good having creating some awesome window art to last us through Valentine's Day.


Monday, January 16, 2012

Book Sling


As recommended by my friend, Mo, I used my novice sewing skills to make a book sling for Parker's room. Parker's room doesn't have adequate space for a bookshelf, but we are swimming in books at this house. The sling gives us a cute, practical space for storing books! I tried to coordinate fabric colors with her curtains, but honestly I wish I had chosen something different. I love the way the sling turned out, but I'm not crazy about the stripes - a bit more whimsy would have suited my taste better. Now that I have the dowels and brackets, I figure that making another sling as Parker grows older, and has an opinion on her decor, will be fairly simple. I am even thinking that Brynn may need one of these above her bed since she has no headboard. Her most favorite books could be tucked inside to avoid loosing them in the midst of the other chaos on the shelf, under the bed or among the toys. Overall, I enjoyed making this project and may have to whip up a few more for around the house! If you'd like to make one for yourself, you can find the tutorial at Penny Carnival's website.


Tuesday, January 10, 2012

What draft?

So, the picture above is what our kitchen floor has looked like all winter long. Our garage is behind that door and the temperature is drastically different between the two spaces. Our door has a small gap at the bottom that allows the cold air to come in, so I used my newly learned sewing skills to make a draft stopper. I took advantage of the great sale and teacher appreciation weekend at JoAnn Fabrics and bought 1/3 yard of upholstery fabric. After washing and trimming the edges, I sewed the two long sides together, pressed the seam flat and then turned the tube right-side out. I then folded in one side about 2 inches and sewed the opening shut. I used kitty litter as the filler then finished off the other end. I am happy with the way it turned out - the only bummer is that the kitty litter has a strong floral smell, which I'm not loving. Hopefully with time the odor will fade and not be noticeable. This project was finished in no time, which made it even more fun for me.

Next in the sewing world is practicing a zig-zag stitch since I do not have a surger. I found some simple skirts that I'd like to make for Brynn's birthday.