background

Wednesday, December 21, 2011

Gift Giving

Marshall and I think it's important for our girls to feel the joy of giving during the holidays since they both receive so much. So, this year Brynn and I crafted some ornaments for her to give to the special people in her life. I got the idea from Disney's Family Fun website. It was a process, but Brynn was able to participate in each step. And the best part is that they turned out great, too!

First we had to cut or rip up construction paper into small pieces. One piece of 8.5 x 11 paper per ornament that you want.

The small pieces go directly into the blender because the second step is to allow the paper to soak in very hot water for 5 minutes prior to pulsing into a pulp.

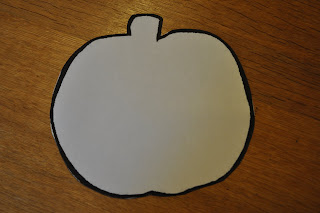
Once you have the pulp ready, you spoon it into cookie cutter shapes and sprinkle with glitter. Press the pulp down to squeeze out any excess water and to pack in the shape. Once it is pressed, place onto cookie sheet for baking. It took a couple of hours in the oven before the ornaments were dry.
(Note to self, it's time to clean the oven!)

We attached a variety of Christmas ribbon to the ornaments with Elmer's style glue. I added a tab of paper once the glue began to dry as a way of keeping the ends of the ribbon more flat - and it made a nice spot to label that they were made by Brynn in 2011.
Brynn is pretty excited to give out her ornament gifts this Christmas. She's really proud of having made them herself and is looking forward to the surprise for everyone. I recommend this project for anyone, any age. We both got a lot of enjoyment out of the process and have a pretty nice ornament to hang on our tree. Merry Christmas!


Embroidered Shirts


I have been reading the blog Made and she has some great tutorials and crafty ideas. I wanted to create a monogrammed t-shirt for Parker's One Year photos, because I loved the one that Brynn had in her's. So I took the idea from Made and created one of her Sprinkle Shirts. I love the way they look on her website and figured it'd be fairly simple for a novice seamstress like me. I enjoyed embroidering the letter, Brynn was even into helping with it a lot. I had a bit of trouble sewing the letter onto the t-shirt. It didn't end up straight, but it's good enough when Parker is wearing it.
After finishing this one, I thought that Brynn may like something similar. Because she is almost 4 years old, I thought she was beyond loving a t-shirt with her initial on it; and since she is so into princesses right now, I decided to make a crown shirt for her. I am much more pleased with this end-product. Practice definitely helps when figuring out how to sew! I even decided to create two more for the neighbor boys' Christmas gifts. If I can get photos of them wearing their shirts, I'll post them later.


Monday, December 19, 2011

Hooded Cowl - Not so sure.


I made this cowl as a gift, but I'm not quite sure how I feel about the end product. I used the free Bernat "Hooded Cowl" pattern, but not the recommended yarn. I had some leftover Simply Soft yarn from my cowl that I wanted to put to use, so I just grabbed two more skeins of that to finish off this cowl. I held two strands together because the recommended yarn was a bulky weight and the Simply Soft is worsted. I used a large hook - 11.5 mm. I like the look of the stitch, but I think it turned out a bit too wide and much too short. It was supposed to be 26 inches in length to allow for pulling up over as a hood, mine ended up being about 18 inches long. It can still be pulled up over your head and ears, but without much length in the back. It is also pretty heavy and bulky. Luckily the recipient is pretty fashionable, so hopefully she'll figure out a way to wear it. I probably wouldn't wear it myself. And since it's a gift - it's the idea that counts, right?


You can tell I'm thrilled with it in the last photo. Do I look a bit like Mother Mary? :)


Sunday, December 11, 2011

Creating Something for Me!


I rarely take the time to make something for myself, but am glad that I have this time. Lately with the cold temperatures, but dry weather I have been walking to get Brynn and Cole from preschool. I have really been wanting a scarf to keep my neck warm but I didn't want anything too bulky because my jackets seem to be a bit slim-fitting. So, I decided to make a cowl or circle scarf. I have been reading the blog Luv in the Mommyhood and she had a cowl knit along earlier this fall. One of her featured photos was of this crochet circle scarf. So, I gave it a try. It was a lot of fun because it was so quickly pulled together. I didn't make the cowl quite as wide as the pattern was written for, to avoid so much bulk. Here it is:

Tuesday, November 8, 2011

I did it!

I completed my first sewing project - well, two projects really. I brought home my mom's sewing machine from our last visit up to Bellingham because I wan
ted to make curtains for our bedrooms. We recently put new windows in our house and they were still sweating over night due to our light-blocking blinds - which if not taken care of leads to gross mold and mildew. So, I decided that having curtains would still allow for privacy, but would also have better air-flow to stop the sweating. My mom gave me a quick tutorial at her house and then sent me home with her machine. I took advantage of JoAnn's super Veteran's Day sale and picked up 4 yards of material in each print. I followed this simple tutorial by Design Sponge, but made 2 panels for each window.I
started with Brynn's room and learned a lot in the process. My hems didn't ever quite line up; they were wide enough to cover the window, but not the whole rod when shut; the length was great, but a bit longer would be nicer. Here they are:


So when I got around to Parker's I had a frame of reference to go from. Plus, the fabric in Parker's print was much easier to cut and press because all of the dots were in straight lines. This second set has much better coverage on the window and the hems line up! Here they are:

I'm not sure that I've caught the sewing bug quite yet, but I do have plans for another project or two. If they turn out well, I can foresee a new hobby in the future.

Friday, October 21, 2011

Little Gnome

After making the newborn cap out of my sister's hand dyed yarn, I was in love with the texture and color. So, I had a small amount left to figure out something for Parker. I thought this little Pixie Hat would be cute on her. I love the way the yarn looks when stitched up. The hat on Parker just cracks me up because of her big cheeks, poor kid! It's a perfect fit for now and the chin strap is nice because she is one who pulls everything off of her head.


Friday, October 7, 2011

'Bout to Be Busy

I have a boom of hat requests from previous customers and friends. I guess this is the true sign of fall. The first hat I have made is with yarn that was hand-dyed by my sister in a beautiful, variegated purple. It is a silk/merino blend and is super soft and cozy. I made the cap for a girlfriend from high school, her sister has bought hats from me in the past and now wants another to give to her sister as a gift for her newborn baby niece. I think they will really appreciate that both my sister and I have had a hand in the creation of this little cap. To make the hat, I alternated a single crochet with a half-double crochet stitch and finished it off with a single crochet rib brim. I love the way it turned out for a simple stocking cap.


Sunday, October 2, 2011

Fridge O'Lantern

I got the idea for this magnetic Jack O'Lantern online and thought it would be a fun, easy project to kick off the month of October. Plus, we hardly have any Halloween decorations, so I thought this would help make up for the lack of spirit. Brynn and I headed out to JoAnn Fabrics for some supplies. I downloaded a pumpkin template from the internet and increased the size to fit on one sheet of computer paper, then cut it out. I then traced this template onto a piece of orange construction paper and added a bit of green for the stem.

After doing that, I began to peel the plastic coating off of the self-adhesive magnetic sheet - what a bear. I must have gotten the wrong type of magnetic sheeting. It was nearly impossible to get the darn stuff off. I bought two sheets, but will be taking the other one back for sure. Brynn's old toddler group used to make magnets all the time, so there must be a product that is easier to use.
After I had removed enough of the plastic, I placed the pumpkin onto the magnetic sheet and cut around it, creating a large pumpkin magnet. I then used the scraps of magnetic sheet to put together a variety of shapes for the girls to use to create Jack O'Lantern faces. I am pleased with the way that it turned out and all of us have had fun switching up the faces throughout the day. I don't think Brynn fully understands the concept, because she prefers to use every shape each time, stating that her pumpkin has "hair, cheeks, chest and eyebrows." Nevertheless, it was a success!


Saturday, September 24, 2011

Lil' Pumpkins


Wow, fall is here already! Although, today was easily in the upper 70's; which is an uncommonly warm day for late September. This year I decided to make a set of matching pumpkin hats that the girls will be able to wear from now through Thanksgiving. I hope that I can convince Brynn to wear hers as she hunts for her own pumpkin in the patch (I'll be crossing my fingers until then). I love the way that the hats turned out.

The pattern was pretty easy to follow. The way that I got the ribbing was to use a fpdc stitch. I wanted the fit of the hats to be snug, but not to pull on the stitches. In other words, I didn't want a holey look to the hats. So, for the larger one I increased for the crown until there were 5 stitches between each fpdc and 4 between for the smaller hat. Brynn is 3.5 years old and Parker is 9 months; both hats fit great! I had never created a curly tendril prior to these hats, what a neat technique and very simple: chain 20-40, then repeat (2sc, 3sc) to the end of the chain. These are definitely great caps that work up very quickly. I think the pattern would make a cute tulip cap with brighter colors for the spring, so I may modify the stem a bit to try it later on.

Sunday, September 18, 2011

Birthday Fish Hat


I saw this hat pattern and knew that it was the perfect gift for our buddy Cole. Cole turned four this past Saturday and I finished the morning of his party. It was a fun project to do, even though I am not a fan of having to do so many finishing touches. It was a hit at the party.
Unfortunately, I didn't get any photos of the birthday boy wearing the hat - it was a bit crazy with kids during the gift time. I did, however, get Brynn wearing the hat right before heading to the party.


Tuesday, August 16, 2011

Teething Shapes


Parker recently discovered some old crocheted fish of Brynn's. She really went to town chewing on them, so I figure the texture of the yarn and stitches must feel good on her gums. With that in mind, I decided to make her some teething shapes out of cotton. I created two of each shape in different variegated yarn colors then connected them together with a single crochet stitch all around. This way the shapes stay rigid without rolling on the edges and give her some more bulk for chewing. I plan to try wetting the shapes and putting them in the freezer for an extra good chew. The other aspect that will be nice about these cotton teething shapes is that I can just throw them in the laundry with everything else, instead of having to hand clean them. Hopefully Parker will like them!

Monday, August 15, 2011

Princess B's Crown

This was a quick, morning project. Brynn has really been into dressing up as a princess lately. She has been asking for a crown, so I whipped one out. I found the "Wee Crown" pattern by Deedeen through Ravelry.
Brynn chose the hot blue for her color and was tickled with the end product. It looks a bit more like a headband than a crown, but nevertheless she loves it. I knew that the cotton I used to make the crown would stretch so I adapted the pattern a bit. The pattern, crown peaks, are in a stitch count of 11, so rather than the recommended 110 stitches in the chain row, I did 88. It's a great fit for Brynn, who is 3.5 years old.


Wednesday, June 22, 2011

Sun Hats


I bought this pattern from Busy Mom Designs on Etsy. It is a very simple shell-stitch pattern. I only had one skein of yarn in this lavender and it wasn't quite enough to give Parker's hat the floppy brim. It still works well to keep the sun out of her eyes. The shell stitch body is nice for warm summer days, the kids don't get too hot wearing the hats.


Brynn's Birds


Here is the bird mobile that I finished for Brynn. She chose the paper and beads herself. She also went outside to find the stick.


Tuesday, June 21, 2011

Mobile

Although this recent project is not one of crochet, I still wanted to share what I've done. I had intended to crochet Parker a fish mobile to hang above her crib prior to her birth. Well, she is now six months and until today she had no mobile. So, the girls and I went to the craft store to pick up some paper supplies to make this butterfly mobile for Parker. I found the idea on the Indie Fixx blog. I used two dowels but I didn't really know how to tie them together evenly, so it's a bit off kilter. I also used beading wire, so the lower beads do not weigh down the strands of butterflies as I had hoped. Nevertheless, I really like how it turned out.


Brynn picked out some paper so that I can also make a mobile for her room, but she'd like birds. So, we'll see what can do about that.

Tuesday, May 3, 2011

Another Gift For Baby Olive


The thing about crocheting for a baby is that the projects are so quick and cute. I decided to make Baby Olive a hat to go along with her booties; figuring that she'd get more use out of a hat in the fall. I found this shell-stitch beanie for free online and thought it'd be a good hat for early fall. I made it in the 3-6 month size and it fits Parker perfectly now at almost 5 months. I like the pattern so much that I'm planning to make one for Parker. The best part of the whole thing is that I was able to crochet the hat while the girls napped, in less than 2 hours. I added the double flower for an easy embellishment. The center button is something I hadn't done before, but I really like the added touch it gives. It may be a new trademark for me, especially if I can find some cute, unique buttons. So, this pink one is for Baby Olive, and I'll make another one for Parker and add more photos of that later.


Friday, April 29, 2011

Booties for Baby Olive


I have never crocheted a pair of booties before. I saw this free pattern for "Simple Baby Booties" and thought they were so cute. The pattern was written in a way that I had never crocheted before, so it took some reading and trial and error to get the soles just right. I also had difficulty following the portion of the pattern to create the toe, so I just ended up adapting it to my needs. The first bootie, the left one, is a bit larger than the second one but not enough to make me want to re-work it. Although this particular pair is being gifted to Baby Olive, upon her arrival, I am going to be working up a pair for Parker. I tried them on her feet and loved the way they looked. Parker manages to kick all socks and most moccasins off of her feet, but these little booties stayed on pretty well. I can hardly wait to meet Baby Olive and see her in these booties!